Showing posts with label Beauty. Show all posts

Monday, 16 March 2015

FAVS & REVIEW | All-Time Makeup Favorites For The Face (+Reviews)

I feel really good when people tell me 'Wow! You have really nice skin!' Seriously! Who wouldn't feel good when people compliment you?

I'll then blush a little and tell them 'Aww! Thanks! It's not really my 'real' skin though! xD Its more of my makeup!! I actually have '5' layers of makeup on my face!' To which they'll reply me 'HUH?! 5?! I couldn't tell at all!! Are you serious?' with a (OAO) expression on their faces.

'Yea,' I'll tell them.

'My first layer consists of a primer, my second layer consists of a makeup base, my third layer consists of a liquid foundation, my fourth layer consists of 3 shades of concealer and my fifth and final layer consists of a loose powder!!'

'BUT YOUR MAKEUP LOOKS SO NATURAL!!!'

Okay, I'm venturing into bragging(?) now? But it's legitimate okay, I have reasons to brag thanks a lot. I spend a lot of time perfecting my foundation so let me brag all I want thank you. While perfecting my foundation (this sounds weird), I finally understood what other makeup artists meant by 'blending'.

Blending really plays a huge part in makeup, because it helps to make your makeup meld with your skin perfectly so that it'll look like a 'second skin' and be natural looking instead of being cakey looking.

Instead of just applying the product to your face, 'blending,' to me, means to make sure that your product is 'thinned out' and buffed properly into your skin. Apllying a product to your face takes no more than 2-3 mins, but blending may require a bit more time as you have to spread the product and make sure that it is one thin layer on your face instead of it being patchy.

For my foundation, I use the following products.

 (From left to right) Benefit Stay Don't Stray, Benefit Boi-ing Concealer in 02/03, Benefit Erase Paste in 02, NARS Light Reflecting Loose Setting Powder, CD DIORSKIN Radiant Base in 02, CD Pore Minimizer and lastly, Benefit Hello Flawless Oxygen Wow in Honey

For the brushes I use,


(From left to right) Real Techniques Buffing Brush, Ecotools Foundation Brush, Ecotools Concealer Brush, Tarte Airbuki Foundation Brush and lastly, Tarte The Buffer Foundation Brush

I normally jump between different brushes but the ones that I use the most are these!

The first 3 brushes are pretty good and affordable brushes! You can get them at Watsons! The RT Buffing Brush comes from the RT Core Collection if I'm not wrong, 4 for $39.90, though you can also get Real Technique brushes from under-twenty20, which I frequently get things from! You can get quite a lot of good things from there for affordable prices, the site is really trustworthy and they are also really efficient!! You can also get Ecotools from the same site!

The other two Tarte brushes are good but although they aren't overly expensive, they still left quite a gaping hole in my pocket. I can't recall the exact price of the brushes but the Airbuki Foundation Brush was $47(??) while the The Buffer Foundation Brush was $49(??). Bought them earlier in the year so I am not really sure, but definitely over $45! I remember thinking for quite a while whether I should get it or not!

Good brushes, to me, are easier to handle and navigate, do not shed easily, and are fluffy with soft yet dense bristles!

Having dense bristles are important!! I really hate brushes that are large and fluffy yet not dense, because they don't deposit the product accurately on my face. To keep it short, the brushes don't follow orders well, the bristles don't go where I want them to go. They go in all different directions and are really difficult to control, which makes blending really difficult.

OKAY, enough about brushes! Lets get on to the foundation routine!

Step 1:
I start off my foundation routine with my Pore Minimizer! It is a Skin Refining Matte Primer, which helps to minimize the appearance of my pores, as well as to help control the amount of oil that appears on my face, which is really helpful because I have oily skin )=

One thing I learnt from using this, is that less is more really works in this case, because no matter how much you put, it'll still have the same effect, so why waste the product by overusing it? Another thing is that when you use more, it'll clog up and look fake!

I use my Ecotools foundation brush to apply this! I apply this product using horizontal stripes all over my face, starting from the center of my face and ending at the outer corners of my face! This creates a really smooth canvas for me to work on later!

This primer is good in the sense that it can be used under or over your makeup as touch-up! I really like this fact because I can cover all the oily spots as the day wears on without being afraid that this primer will mess up my makeup! If you use powder to touch up your makeup and you have oily skin, your skin might potentially change the color of the powder and sigh, your makeup will be messed up!!

Step 2:
I use my Dior Radiant Base in 02. Once again, my Ecotools foundation brush is used to apply this product!! ---> I really need to get another good foundation brush LOL, using two products with one brush isn't really all that hygienic D<

Similar to the primer, the 'less is more' theory works too. This product is a Skin-Refining Makeup Base that helps to prep the skin and helps to even out the skin tone! This is perfect for me as I have an uneven skin tone! My forehead is a shade darker than my face and my cheeks are redder than the rest of my skin! I also occasionally get heat rashes and red patches here and there so sometimes, my skin looks really weird.

Step 3:
Now, I use my Benefit Hello Flawless Oxygen Wow Liquid Foundation in Honey! I have experimented with multiple different kinds of liquid foundation and non has captured my heart and fitted me so thoroughly like Benefit's Liquid Foundation in Honey!!

I use my Tarte The Buffer foundation brush to apply this! I really love this brush because it is really dense yet it has soft bristles! It also provides me with a full coverage and helps me with covering most of my blemishes, which helps me to save money on my concealers.

A little of this foundation can already efficiently provide me with a thorough coverage while still keeping it looking really natural! I know that I have overused the word 'natural' but that is precisely what I am trying to push here! A natural look!

Step 4:
Concealer time!! As the liquid foundation helps to cover most of my blemishes! I do not need much concealer at all!! I start off by using Benefit's Stay Don't Stray in Light/Medium. This is a primer that helps both eyeshadows and concealers to stay put! I dab this on my blemishes, as well as my under eye area and blend it in with my fingers! After it is well blended, I use Benefit's Erase Paste in No.2 Medium. It helps to brighten and camouflage when used on the eyes and the face! I apply this at my under eye area, the inner corner of my eyes, the sides of my nostrils, my nasal labia fold (the line running from your nose to your mouth) as well as at the corners of my mouth because those are the only areas that requires brightening! I don't apply the paste to my blemishes though, because it'll only brighten them and draw more attention to them, which is a huge NO-NO!

I use my Ecotools concealer brush to dab the Erase Paste onto my designated areas, before using my fingers to blend them well! After this step, I use my Benefit Boi-ing concealer in 02/03 on my blemishes as well as my eye-bags and eye-rings! This concealer is quite pigmented, so only a little is really needed! I like this point because only a little is needed and therefore it lessens the chance of a cakey look!! I really really hate cakey looks! It looks so '......' I don't even know how to describe how I feel about it. For the concealer, I dont use the concealer brush, but instead my fingers to apply it! For certain products, like cream products, I find that fingers work a lot better than brushes, because your body heat helps to warm up the products and make them easier to work with! Like thanks to my fingers, my concealer is easily blended into my skin.

Step 5:
THE LAST STEP!!! The finishing touch is delivered using the NARS Light Reflecting Loose Setting Powder! This powder has utterly despoiled me. I can never ever see myself using any kind of powder every again. I'm really serious. I SWEAR THIS.

I apply this powder to where I applied my concealer and erase paste to help set them using my Real Techniques buffing brush. After setting my concealer and all, I use my Tarte Airbuki Foundation Brush to brush the powder over my whole face to set everything else! Why don't I just use one brush to powder my whole face at one go? Well, first of all, the RT buffing brush has a flat circular head which enables me to reach and powder the difficult to reach areas such as my under ere area properly! Also, I have to set my concealer first and powder ym face separately, because if I powder it all at once, the sweeping motion will move my concealer and i'll lose coverage!! So yes, two different brushes and two different motions to set my powder!

This powder really is my holy grail! It can be used with or without foundation. This powder is so fine that it helps to fill in all the gaps that may have not been completely covered by the primer and makeup base. Well, to me, I think that this powder turns what is 'FAKE' into 'REAL', if my foundation doesn't look completely natural, this powder certainly makes sure it does!!

The secret of this powder is that it is a mix of white and reddish looking powder (I think its titanium dioxide and iron oxide respectively). This gives you a slight pinkish look after you apply it on your face! It's so fine and translucent looking and doesn't make you look like you covered your face in chalk powder or something as some white powders tend to do!!

I mentioned that it can be used with or without foundation and it is really true! I tested it out once! It's still my skin color, with a slight flush, except that my skin looked and felt so much smoother ! It also evened out my skin tone!

It also consists of ingredients that helps our skin! It has Glycerin and Vitamin E inside of it that helps to nourish and protect out skin and other ingredients that helps to diffuse light so that you'll always look good!!

This is one of my favorite products and therefore I included a picture of it too!


AHHHHHHHHHHH. I'm done with this!! I took like close to 4 hours to write this! I had to think of how to write and make it flow properly! This is like a mix of reviews and a favorites post!

Hope that you enjoyed reading this!

Cheers,

Diiyawn


Thursday, 30 October 2014

REVIEW | Tarte Cosmetics - Leave Her Blushing

This review is on blushes! I did reviews on foundation, lipsticks, lip balms, eyeshadows and all so I was thinking 'It's time for something new!' Hence, this post about cheeks.

Newly added into my collection, is this stunning Tarte 'Leave Her Blushing' blush set! I have heard rave reviews regarding their products and I am absolutely delighted to have a chance to try and use their products!

'Leave Her Blushing', is a set of 3 deluxe Amazonian Clay 12-hour Blushes & Blush Brush set!
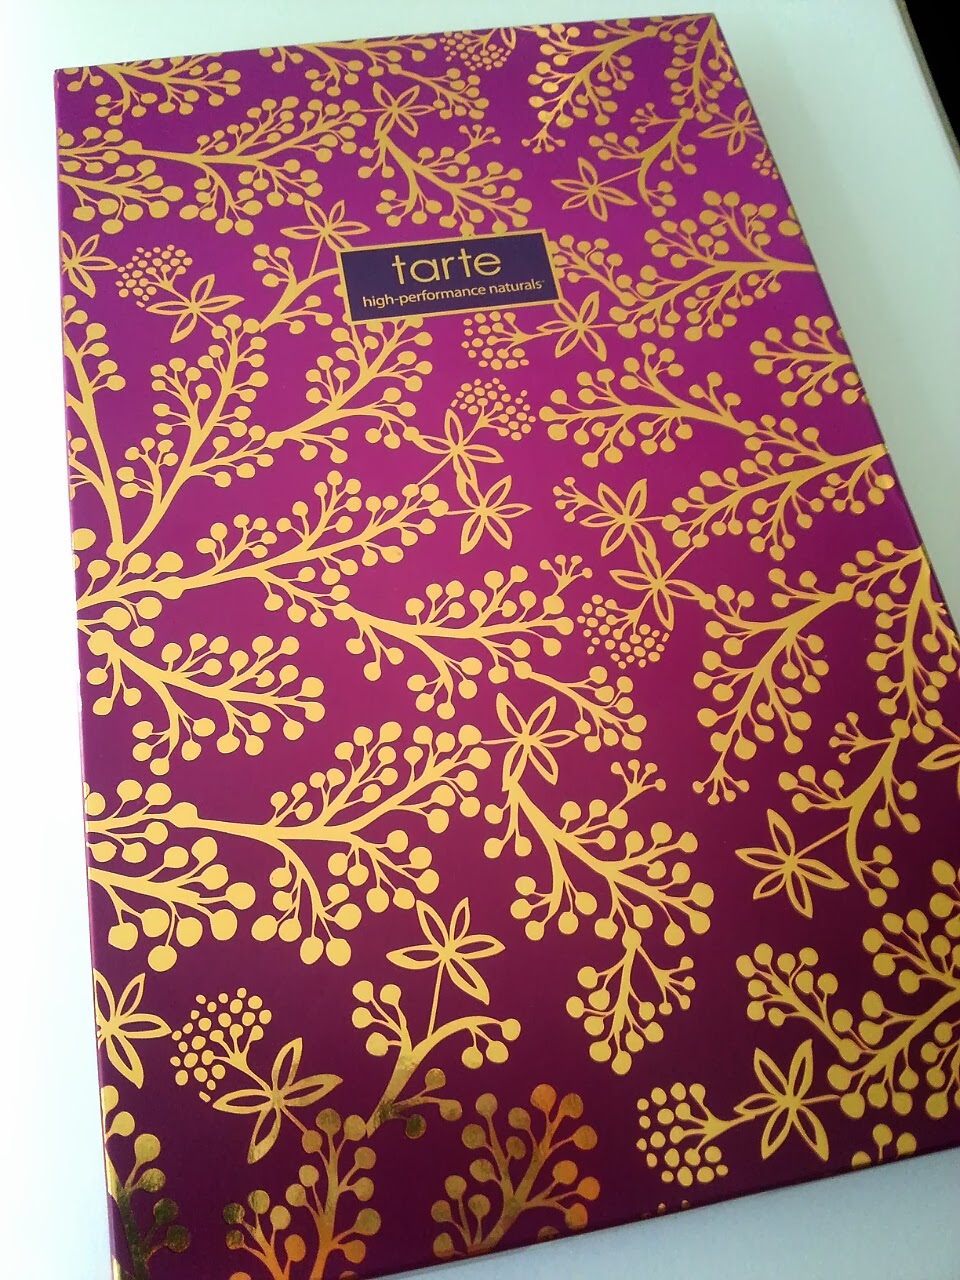
It comes in this pretty purple & gold box!


Isn't it so pretty! The gold branches makes it look so refined!

This is how the packaging inside looks!


The blushes included in this set are
Honoured - a beautiful Nudy Rose shade
Imagined - a startling Candy Pink shade
Treasured - a subtle Melon shade

This is Honoured


Like its description, it has a pinkish tint like roses, except that it leans more towards the brown side. It is a little browner in real life. The color is gradual which allows you to build on the layers, therefore allowing you to get the intensity that you want.

I normally use this when I have intense eyes or lip colors and I just want to give my cheeks a slight wash of color.

This is Imagined


It is a bright shade of pink and it really seems to make your cheeks 'pop'. This is best used when you have subtle eyes and lips. Apply this to the apple of your cheeks but as this is rather concentrated and pigmented, avoid over applying this or you'll look weird! Like you'll look like a overripe apple of sorts.

As much as I love this shade of pink, it doesn't exactly look very nice on me, because I tend to overdo it AHAHAHA!

This is Treasured


This blusher leans more towards the orange side, and I found out that it works great if you are going for a natural sun-kissed look.

For the sun-kissed look, prep your face with the basics like foundation, do your eyes if you want, and then load the brush up with this blusher, and drag it from one side of your face to another. From the apple of one side of your cheeks, over the nose bridge, and then over the apple of the other side of your cheeks. Is that confusing? xD

Tip: To make it even more natural, take a brown eyeliner pencil or eyeshadow, dot your cheeks and nose slightly and then blend it in to add depth and reality to your sun-kissed look! After all, sun-kissed leans toward the tan side as well, so you cannot just be pure orange-red! xD

This series of blushers are good in the sense that they are long lasting and they lessen your need to constantly excuse yourself to touch up your makeup! Isn't that what every girl wishes for? To not have to touch up your makeup too frequently? Because we are all mostly lazy? LOL

These blushers are made with Amazonian clay and before you go 'HUH?! CLAY?! WHATTTTTTTTTTTTT?', read this!

Amazonian Clay helps to minimize the amount of oil in and around the pores to help balance your skin and keep it matte, as well as to help keep the product in place while also helping to hydrate the skin naturally in order to restore moisture, therefore efficiently reducing the appearance of dry flaky skin! Isn't that nice? No flaky or patchy looking skin to annoy us all! :)

These blushers are also formulated without
  • Parabens
  • Mineral Oil
  • Phthalates
  • Triclosan
  • Sodium Lauryl Sulfate
  • Synthetic Fragrance 
I don't exactly know what these are, but since these blushers are formulated without those products, those products probably help to make your skin dry, flaky and patchy. I think. o.o

Also, these blushers are wonderful and it is great for all skin types! So you can enjoy all of these blushers without worrying that it will harm or worsen your skin condition!

For
  • Oily skin: The Amazonian clay minimizes oil in and around pores to balance skin and keep the product in place so that the oil doesn't cause the blush to run or get blotchy!
  • Dry skin: The Amazonian clay hydrates the skin naturally to restore and provide moisture so that your blush wears better and longer and you don't have to worry that it'll crack!
  • Dull skin: The Amazonian clay helps to improve the appearance of skin clarity as well as your skin texture!
  • Combination skin: The Amazonian clay is completely intuitive! It will give the skin an overall smooth and even texture!
This product can be bought from HERE through under-twenty20!!

Alternatively, you could buy Tarte cosmetic products through the official Tarte Cosmetics website but they only ship in the States! ): So Singaporeans like me simply have to make use of the Singapore based website that kindly helps to ship Tarte cosmetics in!

Enjoy and go wild Tartelettes!

Peace! >D

Saturday, 10 May 2014

REVIEW | Sleek Makeup - Pout Polish SPF 15 Tinted Lip Conditioner

A while back, I purchased the Sleek MakeUp Pout Polish that I had been eyeing for quite a while. It normally costs $13, but due to the fact that I bought it when Luxola was having a 25% off sale, I got it for around $9.75. What a steal :D

The thing that first caught my attention when I stumbled upon the webpage, were the colors that the pout polish was available in. I had a such a surprise when it came xD I thought that it would be small and round, when in actual fact, it was flat and sleek. The Pout Polish/Tinted Lip Conditioner, was set in a palm sized looking pot and it just looked so endearing to me. It didn't look bulky like my Body Shop's lip balms, but instead, it looked really sleek like its name suggests!

The Pout Polish comes in various colors.


Perfect Plum


Pink Cadillac


Electro Peach


Chocolate Kiss


Peach Perfection

and,


Powder Pink

I am not sure if everyone feels the same way, but the various shades of pink makes me go all 'AWWW!! WANT WANT WANT!!!' while the other colors make me go 'Er...okay?' LOL

I bought the pout polish in Peach Perfection! It took me quite a while to decide which color to get. I was torn between Pink Cadillac, Peach Perfection and Powder Pink. It was a really difficult decision! ): They all looked so good! My friend Sarah, had to intervene because I was really taking a very long time to decide. She convinced me that Pink Cadillac wasn't my color because it was dark pink and it would only serve to darken my lips, while Powder Pink was too pale a pink and it would only serve to make me look sick and queer. So Peach Perfection it was! Pink with an orange tint/undertone.

When it arrived, I was really happy and excited to try it out. Some things that I like about this product is that it is

  • Highly pigmented
  • Built in with SPF15
  • A host of moisturizing oils
  • Able to stain your lips deeper than most glosses
  • Long lasting
Don't you just hate it when your lip products don't last long? You have to constantly excuse yourself to reapply it! So troublesome! D<

The product came exactly how I imagined it. Sweet, endearing, sleek and compact, along with the smell of Vanilla. Such a sweet smelling product. 


With flash


Without flash :)

A few things that I noticed when using this product

  • It takes on the form of a cream
  • It is really smooth when you touch it
  • Glides onto lips smoothly
  • Not sticky to the touch
  • Nice pigmentation
  • Lasts for a fair bit (About 3-6 hours, depending on what you do)
  • If you do not rid your lips of dead skin before applying this product, you will end up with patchy and splotchy lips with flaky skin. YUCKS.
  • Lip balm is advised before usage of this product.
  • Lips have a slight tingly sensation 
  • The scent of Vanilla can get pretty overbearing
Well, overall, I am semi satisfied with this product. Though I don't feel extremely compelled to use this unlike when I first saw it.

I would rate this around a 7.5/10, because the fact that I have to use lip balm before I use this product. WHAT IF I AM IN A RUSH D< WHAT IF I RAN OUT OF LIP BALM AND LIP STICK AND I NEEDED TO USE THIS DESPERATELY HUH! The tingly sensation sort of gets to me as well. It doesn't cause my lips to itch or anything, but it just bugs me. You would too if your lips felt weird. The vanilla scent was probably the one that pulled my rating of 8.5 to a 7.5. I understand that you want your products to smell good, but I think you really went overboard with the scent for this. It can get pretty nauseating if you have to smell it constantly. The saving grace for this is probably the fact that it lasts long and you don't have to keep opening the container and smell that sweet scent. Is it just my pot being so sweet smelling? Anyone else has this problem too?

This product can be bought from HERE through Luxola! Enjoy shopping!

Thank you for reading! Have a happy day! :)

Cheers!


Thursday, 28 November 2013

ELLE BEAUTY SCHOOL - MAKEUP Cheeks

Hello! Have you all been enjoying the posts regarding ELLE'S BEAUTY SCHOOL? xD Did those posts benefit you? It sure did for me! My foundation has been looking more natural recently! If you have your own little tips and tricks, do share! :)

By the way, this is more of a recommendation post xD

'Blush pretty with rose, peach and pink hues.'
 For a ROSY FLUSH, the suggested blushes are


Nars Blush in Orgasm, $50


Diorblush in 676 Coral Cruise, $69


Giorgio Armani Sheer Blush in 02, $53

For an ALL OVER GLOW, the suggested blushes are


Chanel Powder Blush in 78 Delice, $67


Urban Decay Naked Flushed Palette, $48


Benefit Fine-One-One, $47

I have heard rave reviews regarding the NARS Orgasm blush and I really want to try it out! Along with Benefit's Fine-One-One! I really need to start saving up! >.< Christmas present anyone? xD

All ideas and tips come from ELLE BEAUTY BOOK 2013 and I claim no credit for them though I may have rephrased some sentences! :)

Cheers.

Wednesday, 27 November 2013

ELLE BEAUTY SCHOOL - MAKEUP Eyes

It seems that the trending colours are Blue, Mint and Green! =)

'Forget boring nudes. Eyes get wide-eyed with colour and definition.'
Tip#01 - STOP COLOUR MIGRATION.
To prevent eyeliner from smudging, especially if you're using a crayon or a gel, pat on a bit of eyeshadow above the line to help set the colour. Alternatively, use an eyeshadow primer - primers that have a bit of shimmer and shine are good as they can double as an eyeshadow base, before colour application to help colour and liner stay budge-proof all day.

 Tip#02 - GO FOR GOLD.
Want your boring eye makeup to pop? With your ring finger or eye applicator, pat on some gold shimmer shadow onto the middle of the eye, on top of your usual eye makeup for a 3D effect. The iridescent hue of this top eyeshadow enhances the eyes, giving them the illusion of depth as you turn your head. Other subtle shimmer hues that also work well include silver, light grey and pearl.

Tip#03 - AVOID LINING YOUR EYES ALL AROUND
While lining the eyes can define peepers and open them up, do not line the eyes all the way around. This will make your eyes appear smaller, and not as bright-eyed as you had hoped. If you must line the bottom, start the line from the outer edge and stop just a third of the way in. You can also extend this bottom line upwards to meet the upper line in a subtle flick.

The suggested eyeshadows to try out are,


 Diorshow Mono Eyeshadow in 230 Cruise


 Yves Saint Laurent Pure Chromatics in Shade 1 (top left), $88


Shiseido Luminizing Satin Eye Colour Trio in GR412 Lido, $51


Lancome Hpynose Eye Palette Doll Eyes in 03 Menthe a l'O, $90

The suggested eyeliners in the different forms are

In GEL form,


 Clio Gelpresso Waterproof Pencil Gel Liner in Chic Navy, $21.90

In CRAYON form,


Laura Mercier Eye Pencil in Stone Grey, $31

In FELT-TIP form,


Diorshow Art Pen, $48

In LIQUID form,


Urban Decay 24/7 Waterproof Liquid Eyeliner in Radium (4th from the left), $30

Add a pop of colour to your eyes with a bright eyeliner. Happy hues of mint, turquoise and violet, layered on top of a black liner is loved for a modern '60s twist.

I hope that you have enjoyed this post! :)

All ideas and tips come from ELLE Beauty Book 2013 and I claim no credit for them though I may have rephrased some sentences! :)

Until next time! :)

ELLE BEAUTY SCHOOL - MAKEUP Brows & Lashes

Many woman tend to neglect their brows while doing their makeup and I, myself, am guilty of that fact. I always thought 'Why care for brows! The eyes and lips and cheeks and lashes are the most important!' That way of thinking is only partially true. BROWS CAN EITHER MAKE OR BREAK YOUR FACE.

'Full brows and lashes complete any eye look.'
Tip #01 - ADD COLOUR.
 Coloured mascaras are all the rage. We've seen them on the runways and over the counter. But to make the colour truly pop, apply a coat of black mascara - a lengthening mascara is preferred for doll-like lashes - before applying your favourite coloured mascara. For the best results, apply the coloured mascara just to the tips to make lashes truly flutter-worthy.

Tip#02 - WAIT A WHILE.
To intentionally get that clumpy-mascara finish that seems to be everywhere right now, the key is to wait for each coat of mascara application to dry before applying the next. And of course, the more coats - three to four coats is good- the better. But do go slow, because you don't want too much, which can result in droopy lashes. Also, don't wipe the wand. Instead, apply it straight from the tube.

Tip#03 - GET FULLER LASHES AND BROWS AT THE SAME TIME.
Forget skinny brows as fuller bushes are preferred. Have naturally skinny or short brows? Use a lash growth-enhancing serum on your brows to help your brow hairs grow. Yes, it works there too! And for an easy quick-fix for unruly brows, spritz hairspray onto a clean mascara wand and brush.

Here are the suggested mascaras for the individual looks!

For INTENSE VOLUME,


Le Volume de Chanel, $50

For ALL-IN-ONE,


M.A.C In Extreme Dimension Lash, $34

For CURL,


Lancome Hypnose Star Waterproof Mascara, $50

For SHINE,


Shu Uemura Tokyo Lash Mascara, $50

For brows, the suggested items in the different forms are,

In MASCARA form,


Benefit Speed Brow, $26

In CRAYON form,


Estee Lauder Automatic Brow Pencil Duo in Soft Brown/Dark Brown, $44

In FELT-TIP form,


M.A.C Penultimate Brow Marker, $31

In POWDER form,


Bobbi Brown Brow Kit in Cement/Birch (left), $75

For the most NATURAL-LOOKING brows, shape with a brow powder and then tidy up with a pencil or brow gel so that your brows frame the eyes better.

I hope that you have learnt something new! I certainly did! I never thought to use black mascara as a base to make coloured mascara pop. I always thought that the black will ruin everything o.o

All ideas and tips come from ELLE Beauty Book 2013 and I claim no credit for them though I may have rephrased some sentences! :)

Peace.