Showing posts with label Review. Show all posts

Monday, 23 March 2015

REVIEW | Innova Jasny Lens

Hi there! 

Today, I will be doing a review on a new pair of lenses that I've just opened!

The lenses that I will be reviewing today is the Innova Vision Jasny Monthly Disposable Colour Soft Contact Lens! It's such a mouthful and probably wouldn't fit in the title box so I shortened it heh.

There is a Chinese name for these lenses as well and it is 英諾華彩鑽月拋棄式彩色軟性隱形眼鏡. 

Why does this lens sound so weird and Chinese?

I bought them while I was in Taiwan LOL, which is why they might not sound familiar to some people! Don't worry, they are absolutely safe! I got them from a legitimate optical shop in Taiwan. The lenses are available online as well! Just copy and paste the name of the lenses in the Google search box!

I didn't do any research before buying them AHAHAHAHA!!! I just trusted them blindly because they were from a proper optical shop, nothing happened and I am actually quite happy about them in fact! You can choose not to believe me if you want to be cautious! :>


This is the box that the lens come in! I said lens, because there is only one side of the lenses in the box! When you purchase the lenses, you will be given two boxes! Don't mistakenly throw one of them away!!! XDD


The colour I bought~ Green! :>

The information given for the lenses are

CONTENTS: 58% WATER, 42% ETAFILCON A IMMERSED IN A STERILE BUFFERED ISOTONIC SALINE SOLUTION.

DIA: 14.0mm

The information may sound weird but I really did quote the box.


The left side shows the inner side of the lens (the part that touches your eye)

The right side shows the outer side of the lens (the part that the world sees)

I can't seem to find the word to describe the pattern of the lenses o_o

Starburst???

I'll just leave it as that until I manage to find the proper word!

Pictures of when the lenses are worn!


Indoor self photography pictures with the lenses! :D


Outside self photography with sunlight!


Close-ups!

They aren't very obvious and I am having sort of mixed feelings about that :<

I am sort of disappointed that they didn't turn out as green looking as they looked like in the lens case but at the same time, I'm kind of happy that they are a sort of muted looking green because like this, I am able to wear them for daily use!

Hope that this post would be able to help those who are considering this brand/pair of lenses!! :>

You can find out more about this brand through HERE!! The other lenses available are amazing as well! Bought other lenses from Taiwan as well! Will review them next time!

Cheers,
Diiyawn

Monday, 16 March 2015

FAVS & REVIEW | All-Time Makeup Favorites For The Face (+Reviews)

I feel really good when people tell me 'Wow! You have really nice skin!' Seriously! Who wouldn't feel good when people compliment you?

I'll then blush a little and tell them 'Aww! Thanks! It's not really my 'real' skin though! xD Its more of my makeup!! I actually have '5' layers of makeup on my face!' To which they'll reply me 'HUH?! 5?! I couldn't tell at all!! Are you serious?' with a (OAO) expression on their faces.

'Yea,' I'll tell them.

'My first layer consists of a primer, my second layer consists of a makeup base, my third layer consists of a liquid foundation, my fourth layer consists of 3 shades of concealer and my fifth and final layer consists of a loose powder!!'

'BUT YOUR MAKEUP LOOKS SO NATURAL!!!'

Okay, I'm venturing into bragging(?) now? But it's legitimate okay, I have reasons to brag thanks a lot. I spend a lot of time perfecting my foundation so let me brag all I want thank you. While perfecting my foundation (this sounds weird), I finally understood what other makeup artists meant by 'blending'.

Blending really plays a huge part in makeup, because it helps to make your makeup meld with your skin perfectly so that it'll look like a 'second skin' and be natural looking instead of being cakey looking.

Instead of just applying the product to your face, 'blending,' to me, means to make sure that your product is 'thinned out' and buffed properly into your skin. Apllying a product to your face takes no more than 2-3 mins, but blending may require a bit more time as you have to spread the product and make sure that it is one thin layer on your face instead of it being patchy.

For my foundation, I use the following products.

 (From left to right) Benefit Stay Don't Stray, Benefit Boi-ing Concealer in 02/03, Benefit Erase Paste in 02, NARS Light Reflecting Loose Setting Powder, CD DIORSKIN Radiant Base in 02, CD Pore Minimizer and lastly, Benefit Hello Flawless Oxygen Wow in Honey

For the brushes I use,


(From left to right) Real Techniques Buffing Brush, Ecotools Foundation Brush, Ecotools Concealer Brush, Tarte Airbuki Foundation Brush and lastly, Tarte The Buffer Foundation Brush

I normally jump between different brushes but the ones that I use the most are these!

The first 3 brushes are pretty good and affordable brushes! You can get them at Watsons! The RT Buffing Brush comes from the RT Core Collection if I'm not wrong, 4 for $39.90, though you can also get Real Technique brushes from under-twenty20, which I frequently get things from! You can get quite a lot of good things from there for affordable prices, the site is really trustworthy and they are also really efficient!! You can also get Ecotools from the same site!

The other two Tarte brushes are good but although they aren't overly expensive, they still left quite a gaping hole in my pocket. I can't recall the exact price of the brushes but the Airbuki Foundation Brush was $47(??) while the The Buffer Foundation Brush was $49(??). Bought them earlier in the year so I am not really sure, but definitely over $45! I remember thinking for quite a while whether I should get it or not!

Good brushes, to me, are easier to handle and navigate, do not shed easily, and are fluffy with soft yet dense bristles!

Having dense bristles are important!! I really hate brushes that are large and fluffy yet not dense, because they don't deposit the product accurately on my face. To keep it short, the brushes don't follow orders well, the bristles don't go where I want them to go. They go in all different directions and are really difficult to control, which makes blending really difficult.

OKAY, enough about brushes! Lets get on to the foundation routine!

Step 1:
I start off my foundation routine with my Pore Minimizer! It is a Skin Refining Matte Primer, which helps to minimize the appearance of my pores, as well as to help control the amount of oil that appears on my face, which is really helpful because I have oily skin )=

One thing I learnt from using this, is that less is more really works in this case, because no matter how much you put, it'll still have the same effect, so why waste the product by overusing it? Another thing is that when you use more, it'll clog up and look fake!

I use my Ecotools foundation brush to apply this! I apply this product using horizontal stripes all over my face, starting from the center of my face and ending at the outer corners of my face! This creates a really smooth canvas for me to work on later!

This primer is good in the sense that it can be used under or over your makeup as touch-up! I really like this fact because I can cover all the oily spots as the day wears on without being afraid that this primer will mess up my makeup! If you use powder to touch up your makeup and you have oily skin, your skin might potentially change the color of the powder and sigh, your makeup will be messed up!!

Step 2:
I use my Dior Radiant Base in 02. Once again, my Ecotools foundation brush is used to apply this product!! ---> I really need to get another good foundation brush LOL, using two products with one brush isn't really all that hygienic D<

Similar to the primer, the 'less is more' theory works too. This product is a Skin-Refining Makeup Base that helps to prep the skin and helps to even out the skin tone! This is perfect for me as I have an uneven skin tone! My forehead is a shade darker than my face and my cheeks are redder than the rest of my skin! I also occasionally get heat rashes and red patches here and there so sometimes, my skin looks really weird.

Step 3:
Now, I use my Benefit Hello Flawless Oxygen Wow Liquid Foundation in Honey! I have experimented with multiple different kinds of liquid foundation and non has captured my heart and fitted me so thoroughly like Benefit's Liquid Foundation in Honey!!

I use my Tarte The Buffer foundation brush to apply this! I really love this brush because it is really dense yet it has soft bristles! It also provides me with a full coverage and helps me with covering most of my blemishes, which helps me to save money on my concealers.

A little of this foundation can already efficiently provide me with a thorough coverage while still keeping it looking really natural! I know that I have overused the word 'natural' but that is precisely what I am trying to push here! A natural look!

Step 4:
Concealer time!! As the liquid foundation helps to cover most of my blemishes! I do not need much concealer at all!! I start off by using Benefit's Stay Don't Stray in Light/Medium. This is a primer that helps both eyeshadows and concealers to stay put! I dab this on my blemishes, as well as my under eye area and blend it in with my fingers! After it is well blended, I use Benefit's Erase Paste in No.2 Medium. It helps to brighten and camouflage when used on the eyes and the face! I apply this at my under eye area, the inner corner of my eyes, the sides of my nostrils, my nasal labia fold (the line running from your nose to your mouth) as well as at the corners of my mouth because those are the only areas that requires brightening! I don't apply the paste to my blemishes though, because it'll only brighten them and draw more attention to them, which is a huge NO-NO!

I use my Ecotools concealer brush to dab the Erase Paste onto my designated areas, before using my fingers to blend them well! After this step, I use my Benefit Boi-ing concealer in 02/03 on my blemishes as well as my eye-bags and eye-rings! This concealer is quite pigmented, so only a little is really needed! I like this point because only a little is needed and therefore it lessens the chance of a cakey look!! I really really hate cakey looks! It looks so '......' I don't even know how to describe how I feel about it. For the concealer, I dont use the concealer brush, but instead my fingers to apply it! For certain products, like cream products, I find that fingers work a lot better than brushes, because your body heat helps to warm up the products and make them easier to work with! Like thanks to my fingers, my concealer is easily blended into my skin.

Step 5:
THE LAST STEP!!! The finishing touch is delivered using the NARS Light Reflecting Loose Setting Powder! This powder has utterly despoiled me. I can never ever see myself using any kind of powder every again. I'm really serious. I SWEAR THIS.

I apply this powder to where I applied my concealer and erase paste to help set them using my Real Techniques buffing brush. After setting my concealer and all, I use my Tarte Airbuki Foundation Brush to brush the powder over my whole face to set everything else! Why don't I just use one brush to powder my whole face at one go? Well, first of all, the RT buffing brush has a flat circular head which enables me to reach and powder the difficult to reach areas such as my under ere area properly! Also, I have to set my concealer first and powder ym face separately, because if I powder it all at once, the sweeping motion will move my concealer and i'll lose coverage!! So yes, two different brushes and two different motions to set my powder!

This powder really is my holy grail! It can be used with or without foundation. This powder is so fine that it helps to fill in all the gaps that may have not been completely covered by the primer and makeup base. Well, to me, I think that this powder turns what is 'FAKE' into 'REAL', if my foundation doesn't look completely natural, this powder certainly makes sure it does!!

The secret of this powder is that it is a mix of white and reddish looking powder (I think its titanium dioxide and iron oxide respectively). This gives you a slight pinkish look after you apply it on your face! It's so fine and translucent looking and doesn't make you look like you covered your face in chalk powder or something as some white powders tend to do!!

I mentioned that it can be used with or without foundation and it is really true! I tested it out once! It's still my skin color, with a slight flush, except that my skin looked and felt so much smoother ! It also evened out my skin tone!

It also consists of ingredients that helps our skin! It has Glycerin and Vitamin E inside of it that helps to nourish and protect out skin and other ingredients that helps to diffuse light so that you'll always look good!!

This is one of my favorite products and therefore I included a picture of it too!


AHHHHHHHHHHH. I'm done with this!! I took like close to 4 hours to write this! I had to think of how to write and make it flow properly! This is like a mix of reviews and a favorites post!

Hope that you enjoyed reading this!

Cheers,

Diiyawn


Thursday, 5 March 2015

REVIEW | Cath Kidston Makeup Brush Set Review

Hello there~

I was in Hong Kong with my relatives a few weeks ago (last week to be exact), and I was wandering around when I saw a Cath Kidston store and being the sucker for floral prints that I was, I rushed there to browse the products in hopes that the things would be cheaper over there than in SG.

They were slightly cheaper, but that wasn't the best part yet! There were discounts going on and I managed to purchase this beautiful 7 piece brush set for approximately SGD$30! I really love makeup brushes for reasons I know not why and after touching (read molesting :>) the tester brushes, I decided to buy them!

It was my first time hearing of Cath Kidston Makeup Brushes and I went a little :O but since they are selling them in the legit store, I guess that there's no harm in trusting them!

Here is the brush set!

The print is absolutely beautiful!!! Being the hopeless romantic I am, I teared a little as I usually do when I see pretty things. (AM I THE ONLY ONE WHO DOES THAT?)

The brushes comes in a pink lined white pouch with roses printed on it. The pouch is made out of oilcloth, which I felt was a brilliant move on the manufacturer's part because oilcloth can be easily cleaned if it gets dirty, and we all know how easily makeup pouches get, seeing as how the makeup residue on the brushes transfers easily! The pouch is actually a long rectangle that can be folded up into the shape that you currently see it as! Even after folding, the pouch is still relatively flat and doesn't take up much space! Perfect for travelling!

The inside of the pouch looks like this~


I am very amazed that the pattern continues on inside because for most pouches that I know of, the design normally remains on the outside while the inside is like a bleh LOL (in this case, bleh means mundane) 

Each of the brush comes with its very own slot to keep it safe and secure! There is also a plastic flap that covers the top half of the brushes to keep them clean and protected! I have no idea what to feel about the flap honestly because sometimes I'm glad that it's there to keep the makeup residue from transferring while other times, I find it very in my way AHAHAHAHA!!

There is also an extra pouch at the end with a zip for you to store anything else you may need to go together with your brushes!

The brushes out of their pouch!

The brush set consists of 7 brushes! A large fluffy powder brush, a angled powder brush, 2 eyeshadow brushes, an eyeshadow sponge brush, a eyebrow comb brush and a brow brush (?) --> I'm not too sure about that brush.

The brushes, based on the way that they feel, are probably made out of synthetic fibre! They come with a white wooden handle! I sort of wish that they come with their uses engraved on the handle, so that I wouldn't get them wrong EHEHEHEH. I still tend to mix up my brushes at times!


The large fluffy powder brush!

IT WAS SO FLUFFY I COULD DIE!!!

I dont know that if you could tell that the brush is really soft and fluffy from the picture above, but I can guarantee you that it was! The brush is also really densely packed and I think it'll pick up powder really well and will apply your powder on nicely!

The fluffy angled brush! I feel that this would be a good brush for applying bronzer and for contouring your face because its angled and because it's soft yet dense enough that you wouldn't pick up overly much product as well as not scratch your face off LOL. It's as soft and fluffy like the powder brush!

Blushes would would too! Anything would probably work with this brush, I'm just suggesting!


The two eyeshadow brushes and the eyeshadow sponge brush! I grouped them all together because they were all meant for the eyes heh. The first eyeshadow brush has a domed shape and I think it is probably meant for applying eyeshadow all over your eyelid because the area it would cover would be too big for just a specific area.

The second eyeshadow brush is smaller and skinnier and not as dense and it could probably be used as a blending brush or an eyeshadow brush that targets a specific eye area, for example, the crease or something. Still not really good at identifying brushes sorry!

The third brush, the sponge one, I find, is good for picking up and applying glitter all over your eye. The normal brushes I find, do not pick up glitter that easily due to all the spaces they have between the bristles. The sponge is better because it is one flat surface with no spaces between the bristles because it doesn't even have bristles in the first place LOL. This applies to me, not sure how others feel about it!

This is the eyebrow brush and comb! The bristles of the eyebrow brush is pretty well cut and it's firm yet not harsh on the skin! Some eyebrow brushes I find to be really harsh on the skin! Like when you try to brush through your brows, they drag kind of painfully across your skin and irritate the hell out of the skin around your brows and turn them an ugly shade of red tsk. This is fine for me! 

The last brush which I sort of have no idea what it's for. It's sort of rectangular and slightly dense, so maybe a blending brush of sorts? Or maybe a normal eyeshadow brush, concealer brush or maybe even a nose conturing brush? If anyone knows what this brush is for, do let me know! I'll be really grateful! =D


This is a really good brush set and I think this could act as a great starter set for newbies! I'm not too sure if Singapore sells this though! Sorry about that! I am really in love with this brush set because it doesn't have much hair falling out, which is what makes me sad when it happens to brushes.

Thanks for reading!

Sorry if I got too carried away rambling!

Cheers,
Diiyawn


Thursday, 30 October 2014

REVIEW | Tarte Cosmetics - Leave Her Blushing

This review is on blushes! I did reviews on foundation, lipsticks, lip balms, eyeshadows and all so I was thinking 'It's time for something new!' Hence, this post about cheeks.

Newly added into my collection, is this stunning Tarte 'Leave Her Blushing' blush set! I have heard rave reviews regarding their products and I am absolutely delighted to have a chance to try and use their products!

'Leave Her Blushing', is a set of 3 deluxe Amazonian Clay 12-hour Blushes & Blush Brush set!
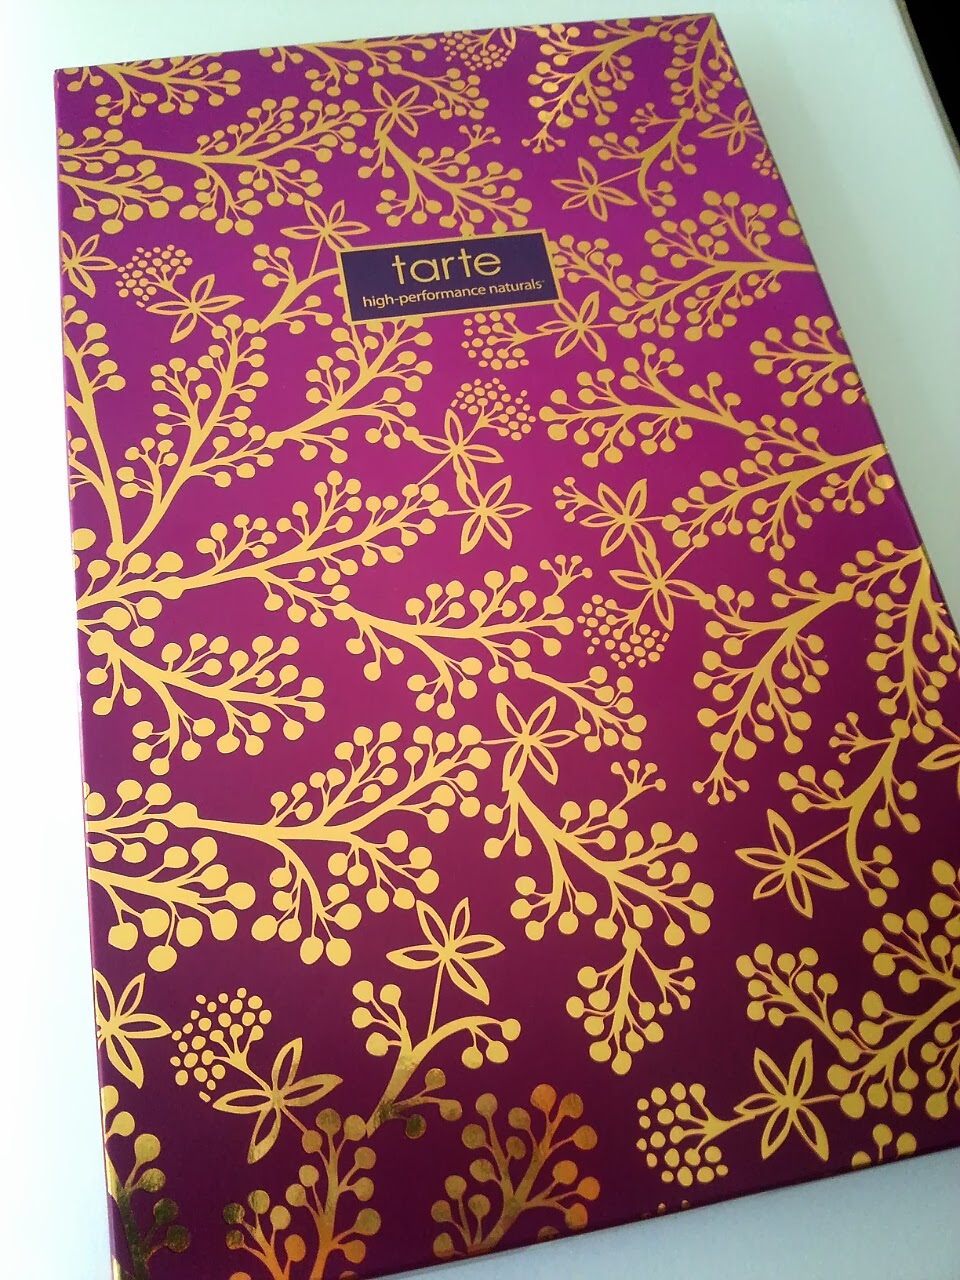
It comes in this pretty purple & gold box!


Isn't it so pretty! The gold branches makes it look so refined!

This is how the packaging inside looks!


The blushes included in this set are
Honoured - a beautiful Nudy Rose shade
Imagined - a startling Candy Pink shade
Treasured - a subtle Melon shade

This is Honoured


Like its description, it has a pinkish tint like roses, except that it leans more towards the brown side. It is a little browner in real life. The color is gradual which allows you to build on the layers, therefore allowing you to get the intensity that you want.

I normally use this when I have intense eyes or lip colors and I just want to give my cheeks a slight wash of color.

This is Imagined


It is a bright shade of pink and it really seems to make your cheeks 'pop'. This is best used when you have subtle eyes and lips. Apply this to the apple of your cheeks but as this is rather concentrated and pigmented, avoid over applying this or you'll look weird! Like you'll look like a overripe apple of sorts.

As much as I love this shade of pink, it doesn't exactly look very nice on me, because I tend to overdo it AHAHAHA!

This is Treasured


This blusher leans more towards the orange side, and I found out that it works great if you are going for a natural sun-kissed look.

For the sun-kissed look, prep your face with the basics like foundation, do your eyes if you want, and then load the brush up with this blusher, and drag it from one side of your face to another. From the apple of one side of your cheeks, over the nose bridge, and then over the apple of the other side of your cheeks. Is that confusing? xD

Tip: To make it even more natural, take a brown eyeliner pencil or eyeshadow, dot your cheeks and nose slightly and then blend it in to add depth and reality to your sun-kissed look! After all, sun-kissed leans toward the tan side as well, so you cannot just be pure orange-red! xD

This series of blushers are good in the sense that they are long lasting and they lessen your need to constantly excuse yourself to touch up your makeup! Isn't that what every girl wishes for? To not have to touch up your makeup too frequently? Because we are all mostly lazy? LOL

These blushers are made with Amazonian clay and before you go 'HUH?! CLAY?! WHATTTTTTTTTTTTT?', read this!

Amazonian Clay helps to minimize the amount of oil in and around the pores to help balance your skin and keep it matte, as well as to help keep the product in place while also helping to hydrate the skin naturally in order to restore moisture, therefore efficiently reducing the appearance of dry flaky skin! Isn't that nice? No flaky or patchy looking skin to annoy us all! :)

These blushers are also formulated without
  • Parabens
  • Mineral Oil
  • Phthalates
  • Triclosan
  • Sodium Lauryl Sulfate
  • Synthetic Fragrance 
I don't exactly know what these are, but since these blushers are formulated without those products, those products probably help to make your skin dry, flaky and patchy. I think. o.o

Also, these blushers are wonderful and it is great for all skin types! So you can enjoy all of these blushers without worrying that it will harm or worsen your skin condition!

For
  • Oily skin: The Amazonian clay minimizes oil in and around pores to balance skin and keep the product in place so that the oil doesn't cause the blush to run or get blotchy!
  • Dry skin: The Amazonian clay hydrates the skin naturally to restore and provide moisture so that your blush wears better and longer and you don't have to worry that it'll crack!
  • Dull skin: The Amazonian clay helps to improve the appearance of skin clarity as well as your skin texture!
  • Combination skin: The Amazonian clay is completely intuitive! It will give the skin an overall smooth and even texture!
This product can be bought from HERE through under-twenty20!!

Alternatively, you could buy Tarte cosmetic products through the official Tarte Cosmetics website but they only ship in the States! ): So Singaporeans like me simply have to make use of the Singapore based website that kindly helps to ship Tarte cosmetics in!

Enjoy and go wild Tartelettes!

Peace! >D

Saturday, 10 May 2014

REVIEW | Sleek Makeup - Pout Polish SPF 15 Tinted Lip Conditioner

A while back, I purchased the Sleek MakeUp Pout Polish that I had been eyeing for quite a while. It normally costs $13, but due to the fact that I bought it when Luxola was having a 25% off sale, I got it for around $9.75. What a steal :D

The thing that first caught my attention when I stumbled upon the webpage, were the colors that the pout polish was available in. I had a such a surprise when it came xD I thought that it would be small and round, when in actual fact, it was flat and sleek. The Pout Polish/Tinted Lip Conditioner, was set in a palm sized looking pot and it just looked so endearing to me. It didn't look bulky like my Body Shop's lip balms, but instead, it looked really sleek like its name suggests!

The Pout Polish comes in various colors.


Perfect Plum


Pink Cadillac


Electro Peach


Chocolate Kiss


Peach Perfection

and,


Powder Pink

I am not sure if everyone feels the same way, but the various shades of pink makes me go all 'AWWW!! WANT WANT WANT!!!' while the other colors make me go 'Er...okay?' LOL

I bought the pout polish in Peach Perfection! It took me quite a while to decide which color to get. I was torn between Pink Cadillac, Peach Perfection and Powder Pink. It was a really difficult decision! ): They all looked so good! My friend Sarah, had to intervene because I was really taking a very long time to decide. She convinced me that Pink Cadillac wasn't my color because it was dark pink and it would only serve to darken my lips, while Powder Pink was too pale a pink and it would only serve to make me look sick and queer. So Peach Perfection it was! Pink with an orange tint/undertone.

When it arrived, I was really happy and excited to try it out. Some things that I like about this product is that it is

  • Highly pigmented
  • Built in with SPF15
  • A host of moisturizing oils
  • Able to stain your lips deeper than most glosses
  • Long lasting
Don't you just hate it when your lip products don't last long? You have to constantly excuse yourself to reapply it! So troublesome! D<

The product came exactly how I imagined it. Sweet, endearing, sleek and compact, along with the smell of Vanilla. Such a sweet smelling product. 


With flash


Without flash :)

A few things that I noticed when using this product

  • It takes on the form of a cream
  • It is really smooth when you touch it
  • Glides onto lips smoothly
  • Not sticky to the touch
  • Nice pigmentation
  • Lasts for a fair bit (About 3-6 hours, depending on what you do)
  • If you do not rid your lips of dead skin before applying this product, you will end up with patchy and splotchy lips with flaky skin. YUCKS.
  • Lip balm is advised before usage of this product.
  • Lips have a slight tingly sensation 
  • The scent of Vanilla can get pretty overbearing
Well, overall, I am semi satisfied with this product. Though I don't feel extremely compelled to use this unlike when I first saw it.

I would rate this around a 7.5/10, because the fact that I have to use lip balm before I use this product. WHAT IF I AM IN A RUSH D< WHAT IF I RAN OUT OF LIP BALM AND LIP STICK AND I NEEDED TO USE THIS DESPERATELY HUH! The tingly sensation sort of gets to me as well. It doesn't cause my lips to itch or anything, but it just bugs me. You would too if your lips felt weird. The vanilla scent was probably the one that pulled my rating of 8.5 to a 7.5. I understand that you want your products to smell good, but I think you really went overboard with the scent for this. It can get pretty nauseating if you have to smell it constantly. The saving grace for this is probably the fact that it lasts long and you don't have to keep opening the container and smell that sweet scent. Is it just my pot being so sweet smelling? Anyone else has this problem too?

This product can be bought from HERE through Luxola! Enjoy shopping!

Thank you for reading! Have a happy day! :)

Cheers!